Перейти к содержанию

MYSTERY MTV-4228LTA2, CV9202

   (0 отзывов)

Информация о файле

В архиве: прошивка +Upgrade instruction of CV9202

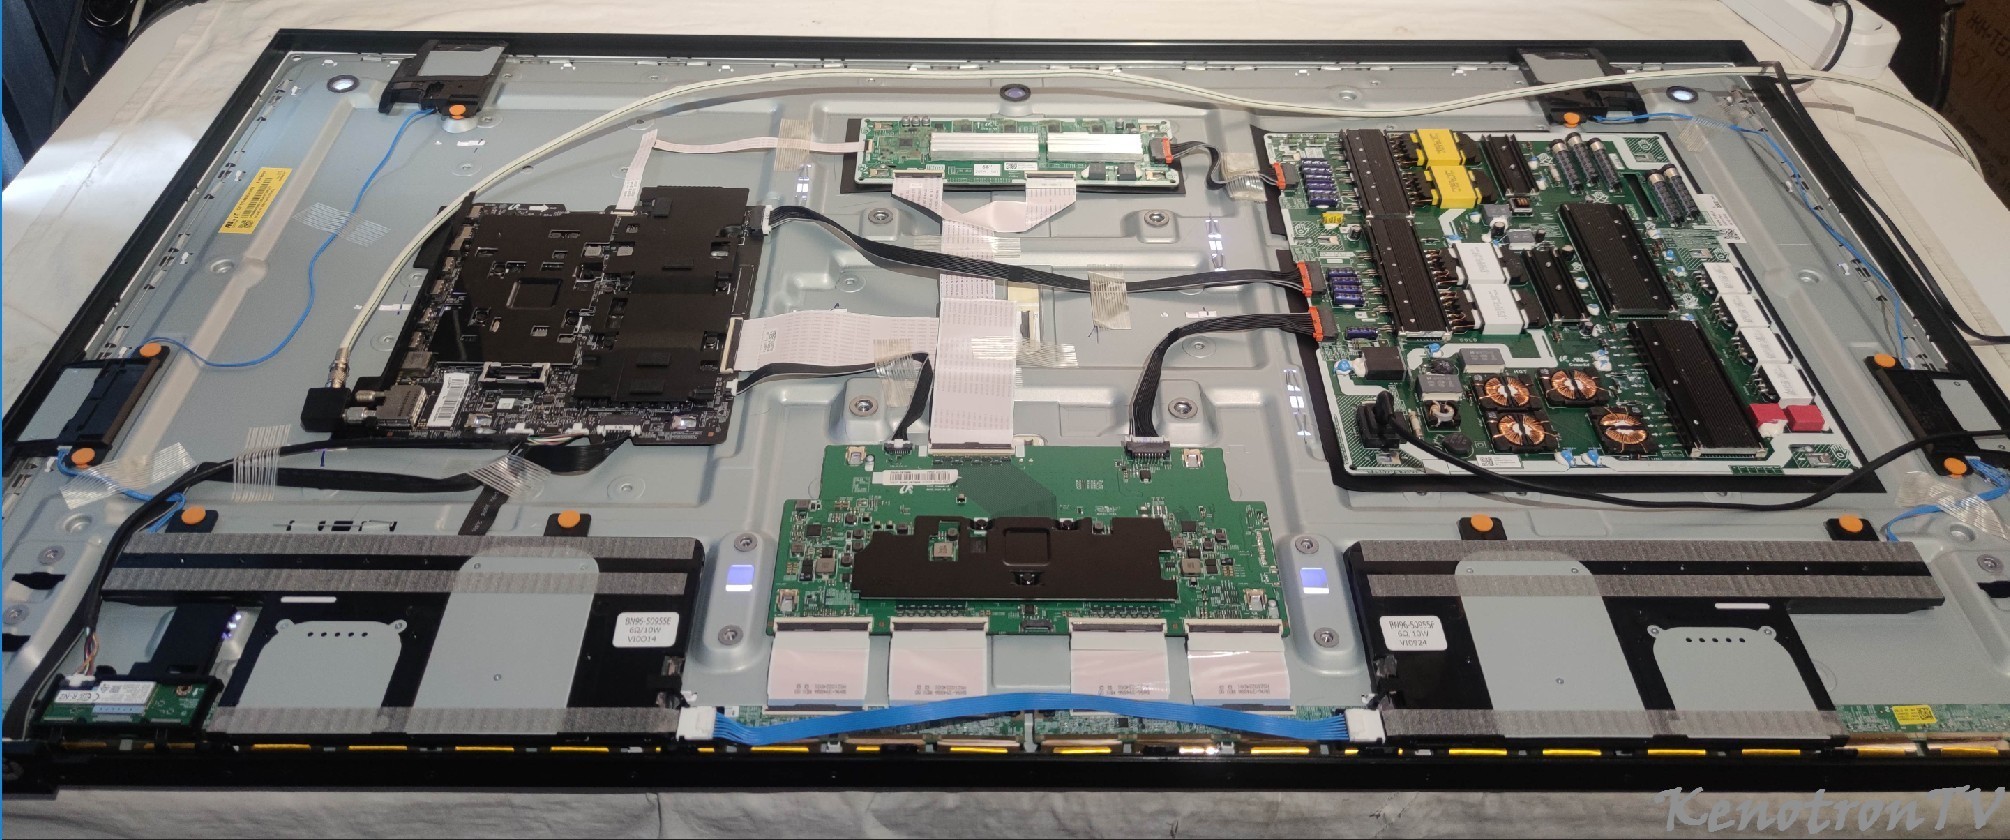
CX_T1407_115RUS_HCSM_LC420DUJ_SGE1_B1029_SI215X_141010_2041(keyboard3).rar

Скрытый текст

ShenZhen Cultraview Digital Technology Co.,LTD
Upgrade instruction of CV9202
1. Full erase mode
This method is designed for the first upgrade or there are huge differences between the 
current version and the latest version.
1) Rename the “rom.bin” to “SPERFBM.BIN”
2) Turn on the TV by power key and change to any source except USB,then connect the 
USB device with “SPERFBM.BIN”.
3) The upgrade menu “searching for software Please waiting” will pop up automatically.At 
the same time the LED start flashing.
4) Watch the progress bar, if the value reach 100%,it means the upgrade process 
finished,the LED will stop flashing and TV will enter standby mode in the meantime. 
Then the USB device can be disconnected.
5) Turn on the TV by power key.
2. Normal mode
1) Turn on the TV by power key and change to any source except USB,then connect the 
USB device with “rom.bin”.
2) The upgrade menu “searching for software Please waiting” will pop up automatically.At 
the same time the LED start flashing.
3) Watch the progress bar, if the value reach 100%,it means the upgrade process 
finished,the LED will stop flash and TV will enter standby mode in the meantime. Then 
the USB device can be disconnected.
4) Turn on the TV by power key.
3. Special mode
This method is designed for some special cases, such as TV cannot start up because of 
the SW upgrade failure. 
1) Copy the “SPUPGD1U.bin”, “SPUPGD2S.BIN” and “rom.bin” into USB device.
2) Rename the “rom.bin” to “SPUPGD3B.bin”
3) Insert the USB device when AC power off.
4) AC power on until the LED start flashing, and then the USB device can be pulled out.
5) AC power off and reset when the LED stop flashing.
Note: If that doesn’t work,then change another USB device and try it again.


Обратная связь

Вы сможете написать отзыв только после скачивания файла.
вам нужно написать комментарий к файлу, указав что у вас сейчас в ремонте
* Добавление фото Main, Panel и бирки на задней крышке TV обязательно!

Мы будем признательны за любую дополнительную полезную информацию по данной прошивке, которую вы сможете предоставить.
Ваши отзывы и отчеты помогут определить работоспособность загруженного дампa и подходит ли он для вашего телевизора, который вы указали в комментариях перед скачиванием этого файла.

  • Избранное

    • Fusion FLTV-32T24 V1N09
      fusion FLTV-32T24 V1N09
      шасси: MSD6308-T8E
      PSU: K-PL-L01
      проц под радиатором 
      панель: k320wd5
      нанд: MT29F2G08ABAEAWP
      T-con lc320exn-sea1-k31
       
        • Спасибо
      • 1 ответ
    • BBK 32LEX-7154/TS2C, HK.T.RT2841P638, USB Firmware Software
      BKK 32LEX-7154TS2C, USB Firmware Software
      USB Firmware Software: (install.img)
        • Отлично!
      • 0 ответов
    • KIVI 65UP50GU
      Марка:KIVI
      Модель:65UP50GU
      Main:HK.T.RT2861V09
      CPU:RTD2861RUA
      EMMC:THGBMHG7C1LBAIL
      Panel: LSC650FN04
       
      • 0 ответов
    • DEXP U43F8000QG, HV430QUB-H10, HK.T.RT2871P738, USB Firmware Software
      DEXP U43F8000QG
      Панель HV430QUB-H10
      Майн: HK.T.RT2871P738
      USB Firmware Software:
      DEXP_43in_U43F8000QG_HV430QUB-H10_rt2871_release-1.3_user_553
      1. Разархивируйте архив с прошивкой  и запишите BIN файлы прошивки в корень пустой USB флешки с файловой системой FAT32.
      2. Телевизор должен быть выключен из розетки. Вставьте флешку с ПО в USB порт телевизора.
      3. Зажмите клавишу POWER (в некоторых случаях СН+ или СН-) на корпусе телевизора, вставьте сетевой шнур в розетку. Через несколько секунд на экране отобразится процесс обновления прошивки, при его отпустите клавишу POWER.
      Не выключайте ТВ до окончания процесса обновления.
      4. После достижения 100% прогресса обновления прошивки, выключите телевизор из розетки, выньте флешку и включите телевизор.
      5. Версию прошивки вы можете проверить в рабочем режиме телевизора, зайдя в Настройки-Настройки устройства-Об устройстве-Сборка OC Android TV.
        • Отлично!
      • 1 ответ
    • PHILIPS TPN10.1E LA .PKG
      Сервисная прошивка для поднятия шасси  TPN10.1E LA по USB
      в архиве:
      one-zip_sw_tpn1011e_v2.12.zip
      one-zip_sw_tpn1011e_v2.13.zip
      one-zip_sw_tpn1011e_v2.150.zip
      nvm for tpn10.1ela.zip
        • Отлично!
      • 4 ответа
  • Статистика Загрузок

    9 153
    Файлы
    884
    Комментариев
    1 018
    Отзывов
    Последний файл
    Автор Неизвестный

    0    0

×
×
  • Создать...

Важная информация

Правила