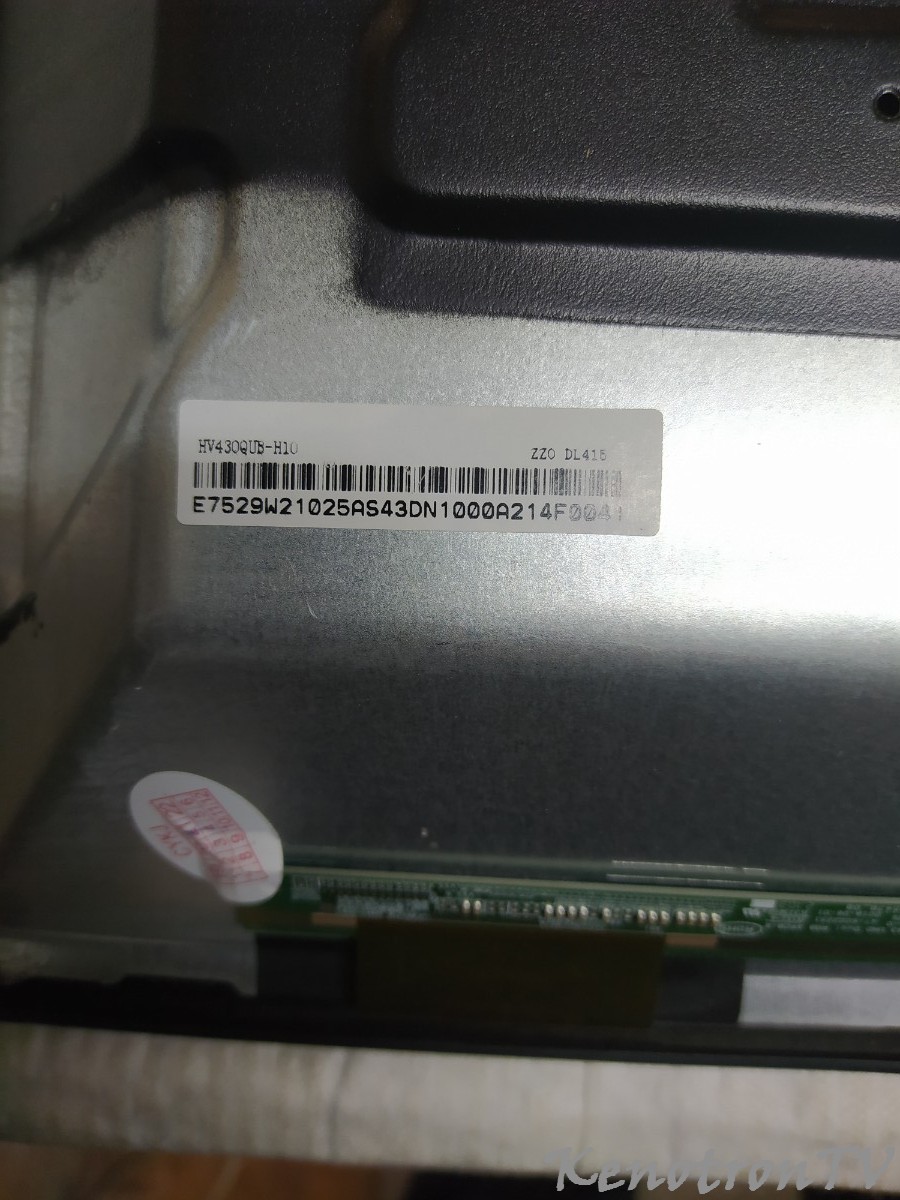
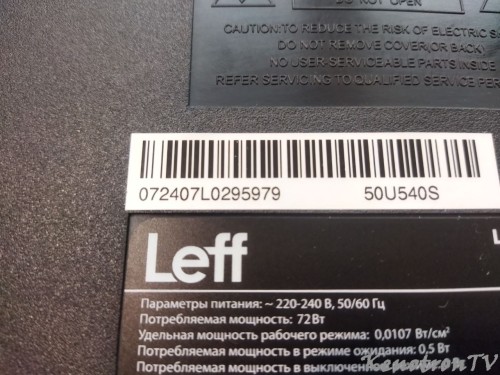
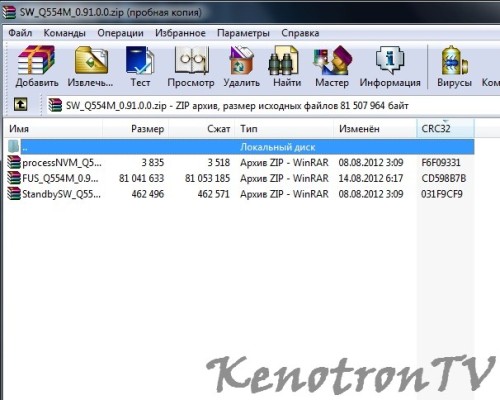
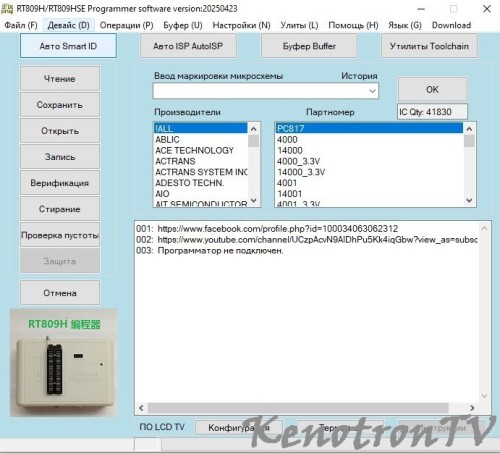
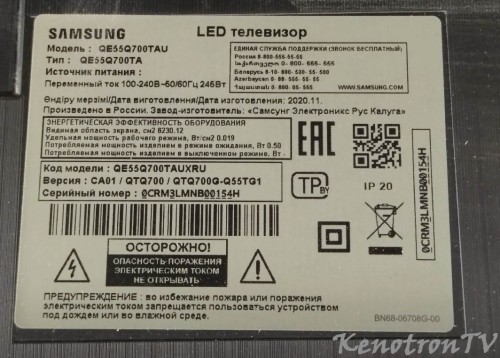
Перейти к содержанию

1 изображение

Информация о файле

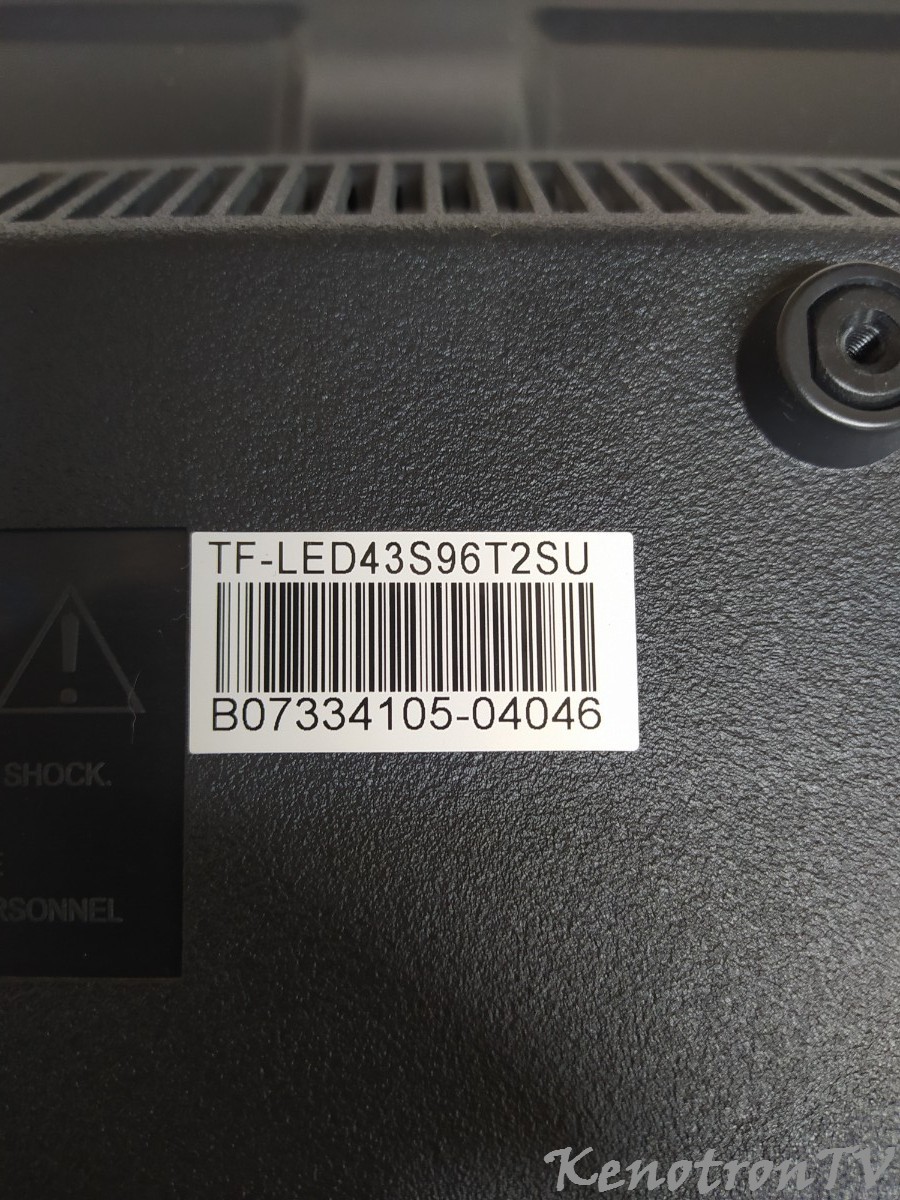
HYUNDAI H-LED32V18T2, TP.SIS231.PT85, T320XVN02.A

CP21452_T1308_45_BMX_SIS231_PT85A_

UKRAINE_T320XVN02_A_IREU508_DVBC_T2_CIPLUG_AT_Mirror_RELT2_R_20131129_141343

H-LED32V18T2SIS 23x Upgrade Guide

  1. USB Upgrade

Copy the bin file for upgrading to USB key root folder.


Main board supports two ways to upgrade:

    1. Upgrade on power supplying

      1. Make sure the main board be in no power supply situation.

      2. Put USB key to main board USB terminal.(USB key has the upgrade bin file)

      3. Power supply to main board, then LED on IR receiver should be blinking slowly.

      4. Wait LED on IR receiver blinks quickly, which means upgrade is finish.

      5. Disconnect the power supply. Done!

Because the initial time of some USB keys are longer, main board cannot detect the USB key when power supplying. If so, please upgrade the main board in factory menu.

PS LED indication blinking when upgrading

When upgrading, LED blink slowly every 1 second.

Upgrade success, LED blink quickly every 1/4 second.

Upgrade fail, red LED lights long time and green LED lights short time in cycle.


    1. Upgrade in factory menu

      1. Power on TV set.

      2. Put USB key to main board USB terminal.(USB key has the upgrade bin file)

      3. Press remote control key -> Menu1147. Enter factory menu.

      4. Select Update -> USB Update -> USB Update Start.


P.S Factory menu upgrade OSD indication

Start upgrading, following OSD will pop-up

1.jpg

System auto loads the upgrade bin file and start upgrading. Processing bar will be shown and LED on IR receiver will blink.
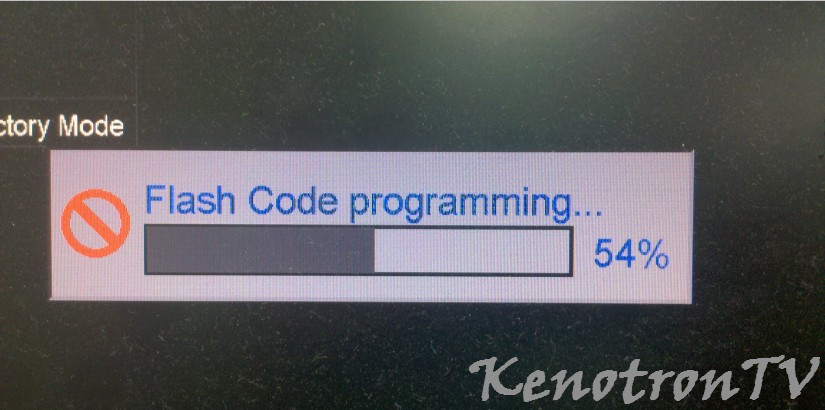
2.jpg


When upgrade is finishfollowing OSD will be shown. Then power down the TV and power up again.

3.jpg


  1. UART Upgrade

UART upgrade is very slow, about 15 minutes. If the main board is not dead, please do not use UART upgrade.

UART upgrade software tool is uart2spi_tool.

UART upgrade steps

Make sure the main board is no power supply. Main board is in power down situation.

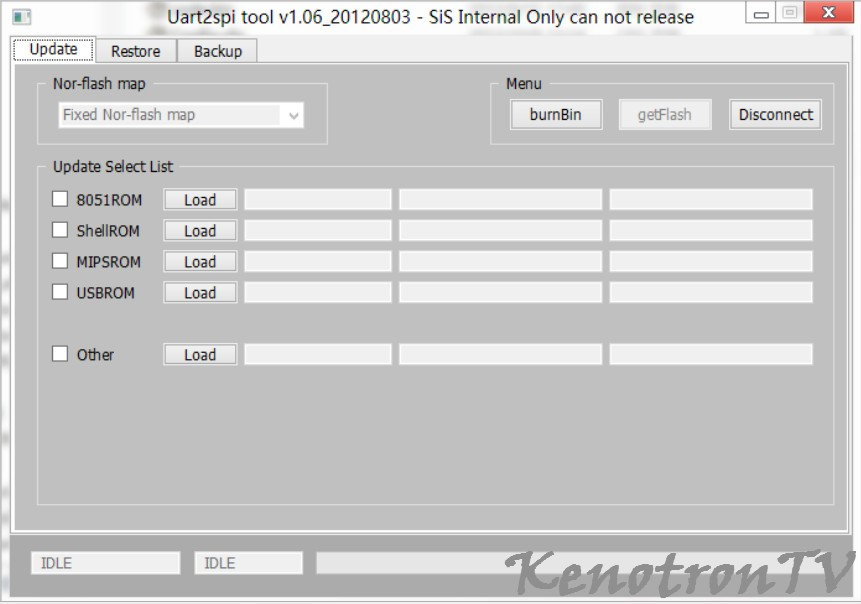
  1. Open UART upgrade software tool: uart2spi_tool in PC. Select correct COM port.

  2. ClickConnect.

  3. Power supply to the main board.


4.jpg

Normally following window will be shown

5.jpg

  1.  

  1. SelectRestore page

6.jpg

  1. Click “Load” button of CodeBin, load the upgrade bin file for upgrading.

  2. Clickrestore.

  3. ClickENTERstart upgrading.

7.jpg


Then processing bar on the bottom will go

8.jpg

First time is erasing the FLASH chip.


9.jpg

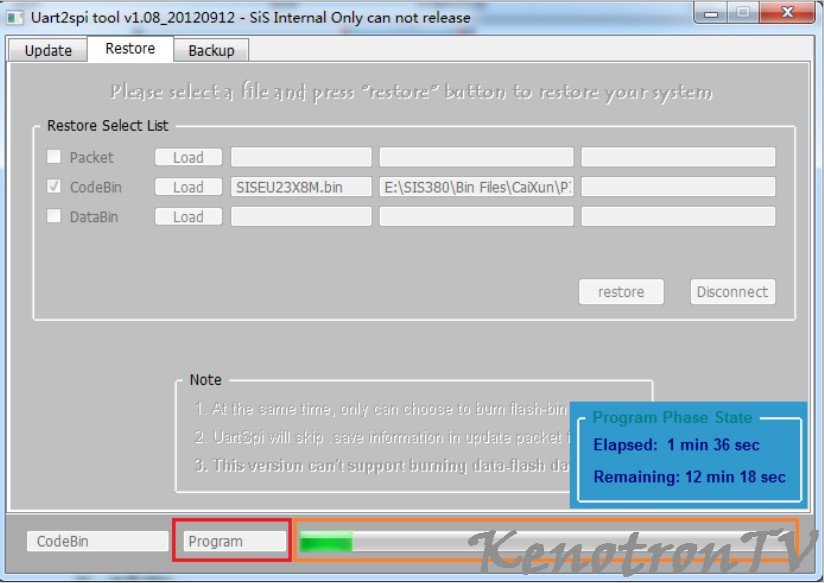
Second time is programing.


10.jpg

Wait programing is finish. Above window will show. Click “ENTER” to exit the window. Please power down the main board and power up.

That’s all.


  • Отлично! 1

Обратная связь

Вы сможете написать отзыв только после скачивания файла.
вам нужно написать комментарий к файлу, указав что у вас сейчас в ремонте
* Добавление фото Main, Panel и бирки на задней крышке TV обязательно!

Мы будем признательны за любую дополнительную полезную информацию по данной прошивке, которую вы сможете предоставить.
Ваши отзывы и отчеты помогут определить работоспособность загруженного дампa и подходит ли он для вашего телевизора, который вы указали в комментариях перед скачиванием этого файла.

  • Избранное

    • SAMSUNG UE40D5500RW ПЕРЕЗАГРУЗКА
      Model:  UE40D5500RW
      Chassis/Version: U66A
      Panel:  LD400BGC-C2
      MainBoard: BN41-01660B 
      Тuner: DT0S40FVH082A BN40-00196A
      Номер нанда под стикером(наклейка) 
      NAND: IC1302 K9GAG08UOE 
      Stiker 40UE: 
      E-man UD5R 
      1027/BB8B 
      11.10.11(2) 
      12.10.11(2) 
      KFG1GN6W2D  ONE NAND
        • Спасибо
        • Отлично!
      • 4 ответа
    • Витязь 50LU1204, TP.SK706S.PC822, KLM8G1GETF B041
      ТВ Витязь 50LU1204
      MainTP.SK706S.PC822
      Panel D50-A30 (CQ500PV7D)
      Прошивка KLM8G1GETF B041 считана программатором RT809H
      Проверена перепрошивкой.
        • Отлично!
      • 9 ответов
    • DEXP U50E9000Q
      DEXP U50E9000Q
      Panel: CV500U1-T01
      Main: HK-T.RT2871P838
      Сервисная прошивка по USB 
      DEXP_U50E9000Q_HK2871_CV500U1_T01_20190924
      [238_2871P838_1.5G_8G_KVANT_CV500U1_T01_Russia_T2_WildRed_190924_205603_svn24434]
       
      Для доступа в сервисное меню
      следует последовательно нажать на ПДУ "SOURCE", "2", "5", "8", "0"
      USB прошивка.
      Для восcтановления:
      отформатировать в FAT32 , файл install.img в корень.
      Ждем прекращения мигания флешки,
      выключить от сети, извлечь, подождать, включить в сеть.

       
        • Спасибо
        • Отлично!
      • 1 ответ
    • Fusion FLTV-32T24 V1N09
      fusion FLTV-32T24 V1N09
      шасси: MSD6308-T8E
      PSU: K-PL-L01
      проц под радиатором 
      панель: k320wd5
      нанд: MT29F2G08ABAEAWP
      T-con lc320exn-sea1-k31
       
        • Спасибо
      • 1 ответ
    • BBK 32LEX-7154/TS2C, HK.T.RT2841P638, USB Firmware Software
      BKK 32LEX-7154TS2C, USB Firmware Software
      USB Firmware Software: (install.img)
        • Отлично!
      • 0 ответов
  • Статистика Загрузок

    9 156
    Файлы
    912
    Комментариев
    1 019
    Отзывов
×
×
  • Создать...

Важная информация

Правила